Information for SwirlRepair Kit and 4-Cylinder/5-Cylinder Rods
Fiat, Alfa Romeo, Opel, Vauxhall, Holden, Saab, Cadillac 1.9l and 2.4l JTD engines
Root Causes: Swirl Flaps, Actuator, Connecting Rod
Fiat, Alfa Romeo, Opel, Vauxhall, Holden, Saab, Cadillac 1.9l and 2.4l JTD engines
Generally failures on the shown type of swirl flaps can have three different root causes:
- The swirl flaps can show signs of increased play. Also for this reason the (friction) bearings have supposedly been updated with engines from 02/2007. The play itself is usually not severe as long as the swirl flaps keep moving though.
- The actuator, which moves the swirls, can be also defective. This can happen if the swirls have been running stiff for too long, but is not very likely to happen.
- Finally and most likely, the the operating rod that connects the swirls can be worn. The rod has four moulded plastic ball joint bushings, which are connected with ball joints on the top of the swirls. If these plastic bushings wear, the operating rod simply falls off the ball joints, so the actuator, which is located at the back of one of the swirls, only moves this one swirl instead of all four.
Source: Youtube.com / Motorservice Group

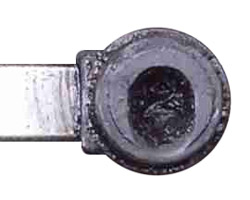
The photo shows as a good example how an originally round ball joint bushing is worn. Note that wear is mainly transverse to the moving direction of the operating rod, so the slightly angular position of the rod and consequent tendency to tilt forward contributes much more to wear than the actual load from moving the swirls.
Diagnostics
It is not too difficult to check for swirl damage. But if doing so, always consider common safety guidelines for work on motor vehicles (let the engine cool down, disconnect battery, keep safety distance when engine is running, etc.).
- Open the hood and pull off the engine cover.
If the cover’s rubber mounts stay on the engine, pull them off and re-attach them to the cover. - Look into the area below the glow plugs. There you can see the swirl flaps from the top as well as the operating rod. The rod either sits on top of the swirls, or it lies next to them.
If the operating rod still sits on the swirl, continue to point 5, otherwise to point 3. - Use a long screwdriver to turn the swirls’ ball joints to the same position as the third swirl from the left – or the swirl on the far right on a 5-cylinder engine. (approx. 10 o’clock – the actuator is on the back of the third swirl, so this one cannot be moved). In doing so, check if the swirls can be turned easily, or if they are running stiff. If stiff, apply some WD40 or similar.
Oil leakage around the swirls additionally indicates play and contamination by the EGR valve. The play itself is not optimal, but normally no reason to replace the complete intake manifold system. It is much more important to clean the EGR valve – see recommendation below. - Put the operating rod back on the swirls’ ball joints, and then firmly press it on to the joints – both most easily from the right to the left. This takes a bit of fiddling and is easier when the glow plugs are removed (careful – do not pull the cables and remember to put the plugs back on before starting the engine).
- Re-connect the battery, stay away from the engine and have someone start the engine and push the accelerator. Then check if the swirls are moving as shown in the video.
Source: Youtube.com / Andreas Jacob
If the swirl flaps should not move as shown, especially not the third from the left that has the actuator on the backside, the swirl actuator is broken. The actuator is available separately, but it is very difficult to access, because it is located underneath the intake manifold. To replace it, the complete intake manifold needs to be removed, so the labour cost alone is usually a few hundred Euros. In this case it makes sense to replace the complete manifold.
But if the swirl flaps are moving as shown, all you need is to get the swirl rod fixed. The swirl operating rod is not available separately from the manufacturer though, and all the manufacturer recommends is to replace the complete manifold including the actuator, i.e. a lot of parts that are still working fine. Even in the best cases the costs for this are easily in excess of € 600. Dealerships in Germany have often charged more than € 1000.
That’s why we made SwirlRepair.
Recommendations
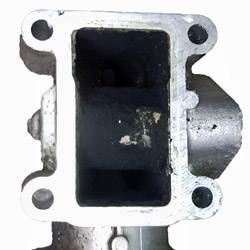
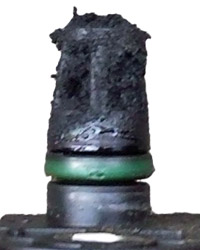
The swirl rod is not the only problem in the intake area. Contaminations of the intake manifold can also cause trouble and even contribute to wear of the swirls. Such contaminations are particularly caused by the Exhaust Gas Return (EGR) valve. Therefore breakdowns of the EGR valve are quite common.
For this reason we recommend to clean the EGR valve and also the boost pressure sensor (black sensor attached to the manifold with a Torx bolt) on a regular basis. Here you find a detailed description that shows how to clean the EGR. The description also shows how to repair an EGR with a stuck solenoid, so if your EGR should fail rather give it a try before you buy a new one.


Source: Youtube.com / Ask The Mechanic
In case your car should detect a failure, a workshop or Authorised Repairer will be able to supply proper diagnostics, and most breakdown services can also check the car’s error memory for records. On some cars you can also perform an initial check yourself though. The video shows how to check for fault codes, and here is a corresponding fault code list (P2075.. for swirl errors).